Wednesday, December 22, 2010

It's Beginning to look a lot like Christmas!

    Christmas is only a few days away, and our family is in full holiday preparation mode, which means baking several batches of cookies a day. We have already made peanut butter blossoms, lime- macadamia nut shortbread, caramels, chocolates with caramel and nuts (peanuts, cashews and pecans), and these cut-out cookies. Needless to say, it's a fun time of year, but good luck fitting into your pants after it's over. I'm posting this recipe because I think it's overall, the most popular type of cookie at the holidays (if there are others you want to see, let me know and I'll try to post it in the next couple of days). And, it's also a lot of fun to decorate them with family and friends. Most people don't have piping kits at home to decorate with, but we just use a ziploc bag with a small hole in it to pipe the icing.
The arm broke off this poor cookie while we were transferring it, but Cory found a way to make it look like we'd done it on purpose. I suggested dressing him in a hospital gown...
     This cut-out recipe is from my grandma, and we've been making them for Christmas for years. Using powdered sugar instead of conventional granulated sugar makes these cookies very soft and delicate. We usually get together to decorate the cookies together. My mom, my sister and I try to make them look pretty, while my dad's technique is to put lopsided smiley faces on most of the cookies. The last couple years, Cory has also joined us for cookie decorating and has made some entertaining additions, including a gingerbread man with a broken arm and a Christmas pirate (see below).
 Cut-Out Cookies

-1 cup butter at room temperature
-1 1/2 cup sifted powdered sugar
-1 egg
-1 tsp vanilla
-2 1/2 cup flour
-1 tsp soda
-1 tsp cream of tartar
-1/4 tsp salt

Buttercream icing
-1/2 cup butter, at room temperature
-1 lb powdered sugar
-3 Tb of milk
-1 tsp vanilla or almond flavoring

for cookies:
-Cream butter in a mixer and sift in sugar until fluffy.
-Add egg and vanilla, and beat well.
-Sift in flour, soda, cream of tartar and salt.
-Chill the dough for at least 1 hour.
-Roll out the dough on a floured surface (to 1/8 of an inch). Cut out the cookies and place on a cookie sheet prepared with parchment paper. Parchment paper isn't required, especially if you have non-stick cookie sheets, but it makes it easier to remove the cookies from the sheet without breaking them.
-Bake at 400 F for 6 min.
-Place the baked cookies on a cooling sheet. They will be very delicate, so you may want to allow them to cool a little before removing them from the tray.
-Allow cookies to cool completely before icing.
How to hold a piping bag
for icing:
-cream butter, sugar and milk together, Add vanilla and add a small amount of food coloring to color the icing. Pipe icing onto cookies by placing icing into ziploc bags and cutting out a small piece of the corner of the bag. You can also use piping bags, but this method requires no equipment.
-Get creative and have some fun! 
My dad did quite a few on this tray- can you figure out which ones? :-)

Wednesday, December 15, 2010

A Family Tradition


    As long as I can remember, my family has made cookies and homemade caramels the Friday after Thanksgiving. This cookie recipe has been passed down in the family for several generations (my grandma, who is now in her 80's, used to make them with her mother as a child). It is based on the traditional German cookie, Lebkuchen, but it has evolved over the years to become it's own entity. We make them as Christmas cutout cookies, but they can also be made in other shapes or rounds. They are similar to gingerbread cookies or molasses cookies. You can decorate them with icing, but they are pretty and delicious without any decoration at all! Every year, there's a discussion about what shapes to make- my uncles prefer the "wise men," but one looks like a conehead and another looks like Bart Simpson.


     These cookies are best when they are rolled out thicker than typical cut-out cookie, making them too thin will make them crisper and more cracker-like. We use hickory nuts in the cookies, but these can be hard to find and expensive because they aren't grown commercially. Pecans would work well, too, but the flavor will be a little different. This makes a large batch, so you may want to start with 1/2 or 1/4 batch to see if you like them first.

"Lap" Cookies

-4 c molasses
-2 c sour cream
-2 Tb soda
-1/2 tsp cinnamon
-1 lb brown sugar
-1/2 c shortening, softened
-1/2 tsp cloves
-4 cups hickory nuts or pecans
-flour

-Mix molasses, sour cream, shortening, brown sugar, soda, cinnamon, cloves until well blended.
-Add in nuts.
-start adding flour, stirring in as much as you can.
Cookie dough before kneading in the last bit of flour.
-scoop out the dough in workable batches (about 2-3 large scoops). Knead in just enough flour that the dough can be rolled out and becomes easier to work with. Adding too much flour will make the cookies tough.
-Roll out the dough so that it is a little less than 1/4 of an inch thick. It will be thicker than traditional cut-out cookies.
-Cut out rounds or any shape you like. It's best to put shapes of about the same size on each cookie sheet, so that they bake evenly.
-Bake at 375 F for about 10 minutes. Make sure you take them out of the oven before they start to brown- bake them just enough to set. Transfer them from the cookie sheet to the cooling rack before they cool completely to prevent them from sticking.
-Make sure you try some right out of the oven and stay tuned for other holiday recipes :-).

Thursday, December 9, 2010

Sinful Lemon Crumb Muffins

    These muffins were one of my favorite treats as a kid, and they still rank at the top of my list! The recipe comes from the Pine Tree Barn Restaurant in Wooster, OH, the town I was born in. In addition to a restaurant, they sell furniture and have a large candy counter (my favorite part). They also have a large Christmas tree farm, and it's where we got our tree every year we lived there. These muffins are really more like cupcakes, but they didn't "count" as dessert, so I was allowed to eat them as part of my meal, which made them even better :-). I couldn't think of any way to improve on this recipe, although I think they'd be good with fresh raspberries or strawberries in them. Also, just to warn you, this recipe makes a ton of muffins. Unless you're baking for a big crowd, it's best to halve the recipe.

Pine Tree Barn Lemon Crumb "Muffins"

For cake:
-3 c sugar                                
-1 1/2 c sour cream
-4 1/2 c flour                           
-2 Tbs +2 tsp lemon juice
-1/2 tsp salt                             
-zest of 4 lemons
-1/2 tsp baking soda                 
-6 eggs
-1 1/2 c cold butter

For crumb topping:
-1 1/2 c cake flour                   
-1 stick melted butter
-1 1/2 c sugar

For glaze:
- 3/4 c sugar                            
-1/3 c lemon juice

-Prepare crumb topping by sifting together sugar and cake flour, add enough melted butter to make crumbs.
-For cake, sift together flour, salt and sugar. Add butter and blend with a fork or food processor until is resembles coarse crumbs.
-In another bowl, beat eggs, add sour cream, zest and lemon juice. Add to flour mixture and blend.
-Fill muffin tins 3/4 full, cover with topping.
-Bake at 350 F for 20 min. Remove and allow to cool.
-Prepare glaze by mixing lemon juice and sugar. Poke 6-8 holes in the top of each muffin, spoon glaze over the top.
-Makes 2-3 dozen muffins.

If you're in the area and would like to try these muffins, visit the Pine Tree Barn Granary Restaurant

Thursday, November 18, 2010

Happy Challah-days!

      About a month ago, my friend Debbie convinced me to take a Jewish cooking class, called "Culinary Shabbat." She assured me that it wouldn't be a big deal that I wasn't Jewish, and that it would be a lot of fun to take the class together. I was a little unsure when I showed up at the Chabad House to find that the class was being taught by the orthodox rabbi's wife... I was even more unsure when the girl next to me started talking about the first time she went to Israel. That said, it was a lot of fun to learn about Jewish culture, tradition and food, even though I felt a little bit like I had to keep my Christian heritage a secret. I think the girls in the class must have thought my parents were the worst Jews in the world- they gave me a Roman name, didn't teach me any of the traditions and I'd never even had gefilte- fish before (not that I was missing out on that one)! One of the best recipes from the whole month was the challah (a soft, eggy bread).
The recipe below makes 2 huge loaves! They were about 12"x6".
    It is traditional for challah to be consumed during Shabbat dinners and holidays, but it is delicious during any time of year. A tradition that was new to me was the dividing of the challah, which is usually done by women. It involves removing a small piece of the challah dough prior to braiding it, saying a blessing and burning or throwing the small piece of dough away. The passage describing the ritual cam be found in Numbers 15:17-21. While I did this in the class, I can't bring myself to throw away any of the dough when I make it at home :). 

Challah
bread dough:
2 c warm water
2 packages (or 2 Tbs) dry yeast
1 Tbs salt
1 egg, beaten
1/2 c sugar
1/2 c olive or vegetable oil
7 c flour

egg wash:
1 egg yolk
1/4 tsp vanilla
pinch of sugar (optional)

- To make bread dough, add the yeast and a sprinkle of sugar to the warm water, and allow the yeast to activate for about 5 minutes. It will appear slightly foamy. If you don't see this, throw out the yeast and start over. Be careful not to have the water too hot, as this will kill the yeast. 
-Add the sugar, salt and 1/2 of the flour (3 1/2 cups). Mix well.
-Add the egg and oil and mix thoroughly.
-Then slowly knead in extra flour a half cup at a time. The dough will become smooth and elastic, resembling the consistency of a stress ball. Stop adding flour at this point, even if you haven't added all 7 cups. Too much flour will make the dough (and bread) tough.
-Coat the dough with a thin layer of oil, cover with a towel and place in a warm place to allow the dough to raise.
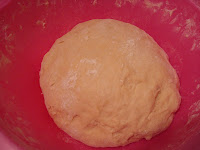
-Allow dough to rise for 2-3 hours until it has doubled in size:

-Divide the dough in half. Then divide each 1/2 in 4 pieces and create 3 ropes of dough. Place them parallel to one another and braid them as shown below. Start in the middle, passing the rope of dough over the first, under the second and over the third. Repeat, going left to right. When there is no dough left, fold the end underneath the loaf. Repeat with the other side.

-Mix the egg glaze, and spread generously over the top of the bread. Sprinkle with cinnamon and sugar or sesame seeds, if desired. 
 -Bake at 375 F for approximately 30 minutes until the top is golden brown.
Hope you enjoy! My plan is to make some challah with olive oil and rosemary for post-Thanksgiving turkey sandwiches :-).

Friday, November 12, 2010

One Smart Cookie

      Cookies have to be one of my favorite deserts to make and eat. They are generally pretty simple to throw together, and I've met very few that I didn't like. It's also very easy to change the recipes without totally screwing it up- you can add chocolate chips or other add ins, or change the flavoring from vanilla to almond and give an old favorite a totally different personality. Also, they bring back a lot of memories of baking with my family, particularly my mom and sister. Baking cookies was a favorite rainy day activity, although they didn't always turn out perfect- once I added twice the flour to a batch because I used the wrong measuring cup and ended up with chocolate rock cookies!
     This recipe for Anzac biscuits is a personal favorite of mine, both because it is simple and absolutely delicious. I inherited this recipe from my mom,but I'm not sure where she got the original recipe from. They are names after Australian and New Zealand Army Corps (ANZAC), which was established during the first world war. It is claimed that they were a commonly made cookie during this era because they had a long shelf life and could be sent to soldiers overseas during the war. Although the traditional version are thicker, I like to flatten them till they are very thin prior to baking- it makes the edges caramelize, making them taste even better. I also typically use corn syrup instead of Lyle's can syrup because it's easier to find and less expensive.
They may have a long shelf life, but they won't last long!

Anzac Biscuits
-2 c all-purpose flour
-2 c rolled oats
-1 c unsweetened coconut 
-1 c sugar
-1 c brown sugar
-1/2 tsp salt
-1 c butter
-2 Tbs corn syrup (or Lyle's Golden Syrup)
-3/4 tsp baking soda
-1/3 c hot water
-1 tsp vanilla
-1 c toasted pecans, walnuts or almonds (I typically use pecans,  but used walnuts this time)
-mix flour, sugar, brown sugar, oats, coconut and salt in a large bowl.
-melt butter, mix with corn syrup, baking soda, hot water and vanilla in a separate bowl. Pour the liquid mixture into the dry ingredients and mix.
-scoop dough a tablespoon at a time onto cookie sheets and flatten with the palm of your hand.
-bake for 8-9 minutes at 350 F. Allow them to cool a little before removing from the tray- they are thin and fragile when warm.

Thursday, November 11, 2010

More Pumpkin Treats

 Here are the rest of the recipes from making the pumpkin pie, as promised! I don't have too much to say about them, except that the pumpkin seeds were so delicious, they were gone before I even had a change to take a picture of them. Enjoy!

Sweet and Spicy Pumpkin Seeds (adapted from Martha Stewart)

-seeds from 1 medium pumpkin, any variety
-5 tablespoons sugar
-1/4 teaspoon salt
-1/4 teaspoon ground cumin
-1/2 teaspoon ground cinnamon
-1/2 teaspoon ground ginger
-Pinch of pepper flakes
-1 1/2 tablespoons peanut oil or vegetable oil

-Rinse seeds well, removing all pulp. Spread thin on a cookie sheet and allow them to dry overnight or in an oven at 250 F for 1 hour.
-Mix 3 Tb of sugar, salt, cumin, cinnamon, ginger, and pepper flakes in a medium bowl
-Heat the oil in a small frying pan, add sugar and stir until it starts to caramelize. Add the pumpkin seeds until they are toasted and coated with the sugar mixture.
-Pour the seed mixture into the dry ingredients immediately and mix well. 

Pumpkin Butter  (improvised)
-1-2 c fresh sugar pumpkin puree
-1/2 c brown sugar
-1-2 tsp cinnamon
-1/2 tsp nutmeg
-1/2 tsp ginger
-1/2 tsp salt

-Heat pumpkin puree in a saucepan over low heat, add sugar and other ingredients. Add more or less of the sugar and spices based on taste, this is just a guideline. In the end, it should taste like pumpkin pie, but less sweet.
-Serve one a thick slice of whole wheat bread,  mixed in plain or vanilla yogurt or just eat it with a spoon!

Sunday, October 31, 2010

A Tale of Two Pies

    A couple of weeks ago, Cory's parents gave me a lovely pie pumpkin from their garden. They had a yield of 3 pumpkins, so I felt pretty special that they have one to me :). Pumpkins are very versatile, and can be used in a variety of dishes, including main dishes, soups and desserts. You can also use almost every part of the pumpkin and it can be used for a fall decoration prior to cooking, so it is a very cost-effective squash as well. From this pumpkin, I was able to make 2 pies, pumpkin custard, 2 jars of pumpkin butter and and caramelized spicy pumpkin seeds. Pumpkin pie is Cory's favorite, so after I made a pie to share with my family (to celebrate my sister's engagement!), I made one to bring down with me when I visited him. It didn't stand a chance- I don't even think his roommate got to try it :-). If you're not in the mood to clean a real pumpkin, this pie recipe can also be made with store-bought pumpkin.
The final product, finished off with butter-crust leaves

    There are multiple ways to prepare pumpkin puree for pumpkin pie and pumpkin butter. The two main ways are to steam or roast it, but both methods can be done with either peeled or unpeeled pumpkin. I think the fastest and easiest way is to steam it with the skin on (as described below). Once the pumpkin is cooked and cooled, the peels comes off very easily and you don't have to waste time trying to peel the raw pumpkin. I like steaming because it is faster and allows the pumpkin to retain its natural moisture. Stay tuned for the pumpkin butter and caramelized pumpkin seed recipes!
This slice was too small and required a second helping...

Perfect Pumpkin Pie (adapted from Martha Stewart)
-1 1/2 cups fresh pumpkin puree (from sugar pumpkin) or solid-pack canned pumpkin (one 15-ounce can) 
-4 large eggs (3 for pie, 1 for egg wash)
-4 teaspoons heavy cream (2 for filling, 2 for egg wash)
-3/4 cup packed light-brown sugar
-1 tablespoon cornstarch
-1/2 teaspoon salt
-1 teaspoon ground ginger
-3/4 teaspoon ground cinnamon
-1/2 teaspoon pure vanilla extract
-1/8 teaspoon ground nutmeg
-1 1/2 cups evaporated milk
-white sugar for dusting crust
-Whipped cream/topping, for serving

For crust:
-use 1/2 of the basic pie crust recipe
For pumpkin puree:
-Cut pumpkin in half, scoop out seeds and loose pulp. Then, cut pumpkin into large chunks. Place them in a steamer basket with a cup or so of water. Place on a burner at medium heat until tender, about 15 minutes.
-allow pumpkin to cool, and scoop flesh from the skin with a spoon. Place in a blender or food processor and blend until smooth.
For pie:
-after preparing the crust, place it in the pie pan, crimp, and place in the freezer till frozen solid, about 15 minutes.
-Mix pumpkin, evaporated milk, 2 Tb cream, brown sugar, nutmeg, vanilla, cinnamon, ginger, salt, cornstarch, and 3 eggs (beaten). Set aside.
-Remove crust from the freezer, line the inside with foil and fill with pie weights (or uncooked rice or beans). -Mix the egg wash using 1 egg and the remaining 2 Tb of cream. Brush over the edge of the pie crust and sprinkle with sugar. Return the crust to the freezer for about 10 minutes prior to baking.
-Place the crust in an oven preheated to 375 F. Bake for 10 minutes, then remove weights and bake for an additional 5 minutes, until the crust is set, but not yet browned.
-Cool the crust completely. Reduce the oven temperature to 350 F.
-Fill crust with filling, and bake pie at 350 F for about 60 minutes. The pie is done when only the center of the pie jiggles when the pie is moved. Cool completely at room temperature and then chill prior to serving.
-Garnish the pie with whipped cream and leaves made from extra crust, if desired.

*Note 1: To make the leaves shown on this pie, use some of the extra dough. Roll it thin, cut out shapes with a butter knife. The veins of the leaves were made with the edge of a butter knife and they were washed with the egg wash, sprinkled with white sugar and baked at 350 till golden brown. After the pie was baked and cooled, they were placed around the edges. 
 
*Note 2: Pumpkin custard may be made by heating the leftover filling in a saucepan, over medium heat, stirring constantly. Remove from heat after it has reached the consistency of wet scrambled eggs. It's great if you can't wait to try the pie!


Mel and Ty. Pie makes everyone happy, but being engaged made these two even happier!

Sunday, September 26, 2010

The Apples of my Eye

     In lieu of going to the UM vs BGSU game, Cory, my sister, Melissa, and I decided to go to a cider mill to get some hot cider, donuts and of course, apples. We went to the Alber Orchard in Manchester, MI, which has an orchard and a cider press that has been in service for over 100 years. The cider and donuts were very tasty, and they have a large variety of apples, including some heirloom types that are not commercially available. They have great names, like Roxbury Russet, Wolf River and Nonesuch, and I imagine they're delicious, although I didn't try any of them. I came home with a huge bag of Cortland apples, which are my favorite baking apples. 
Cory, Melissa and I at Alber apple orchard in Manchester
     This apple crisp recipe is adapted from Martha Stewart's recipe. I didn't make many changes, just added more cinnamon and didn't bother measuring out the exact amount of lemon. It's really quick and easy to throw together and it made my apartment smell amazing (about 20 minutes for prep, 1 hour to bake). Crisps like this are delicious, and also a little bit healthier than some desserts because they have oatmeal and fruit in them. Don't fool yourself, though, they're still made with sugar and butter and aren't exactly a health food. If you want a healthier version, try using whole wheat flour in the topping and a sugar substitute in the fruit mixture. As usual, I don't recommend replacing the butter- you can always taste the difference. This crisp is best served warm, by itself or with ice cream. It also tastes great cold with vanilla yogurt as a parfait.

Apple Crisp 
Topping:
-3/4 c all-purpose flour
-1/4 c packed light-brown sugar
-1/2 tsp salt
-1/2 c plus 2 tablespoons granulated sugar
-8 Tbs (1 stick) unsalted butter, cold, cut into small cubes
-1 c old-fashioned rolled oats (not quick-cooking)

Filling:
-3 lbs apples (about 7),  peeled, cored, and cut into 1/2-inch chunks
-Juice of 1 lemon
-2 tsp ground cinnamon

-To make topping, mix brown sugar, 2 Tb sugar, flour and salt in a bowl.
-Add butter, using a pastry cutter or forks to mix and chop butter.
-Add the oats and use your hand to mix until the topping forms small clumps. Cover and place the mixture in the freezer while you prepare the apple filling.
-Preheat the oven to 375 F.
-Peel, core and cut the apples into bite-size pieces. Pour them into a bowl and add lemon, the remaining 1/2 of sugar and cinnamon. Mix well and pour into a 9x13 baking pan (or another dish of your choice).
-Sprinkle the topping over the apples and bake for 50-60 minutes. The top with be golden brown and the fruit juices will be bubbling. Allow to cool for 10 minutes prior to serving, although it smells delicious, it will be very hot!
Melissa going a little Twilight on the apple tree.

Wednesday, September 22, 2010

Millions of Peaches

    A couple of weeks ago, my family went to Glen Arbor, MI for a long weekend, and I picked up some beautiful Red Haven peaches from an orchard on the way back. While I couldn't resist eating a couple myself,  I decided that they would be best used in a pie. Luckily, later in the week, my friend Lauren turned 26, giving me a perfect opportunity to try out a new recipe. So, we took her to her favorite restaurant, The Olive Garden, indulged in way too much salad and breadsticks, and returned to my place for pie
Gorgeous Red Haven Peaches from Gallagher's Farm Market near Traverse City
     This was actually the first peach pie I'd ever made, and I thought it turned out quite well. It's spicy and sweet without being overwhelming, and the peaches were fresh and flavorful. "Free stone" varieties, such as Red Haven are the easiest to use because the fruit is easily removed from the pit. This recipe was adapted from 2 different recipes: Deep-Dish Peach Pie from Bon Appétit , 2010 and Spiced Peach Pie from Bon Appétit, 2000. I don't think I'd change anything about the recipe, except maybe to use more peaches, add a dash of cloves and chill the streusel topping so that it held together a little better. Overall, though, it was a great recipe!


Peach Birthday Pie

Crust:
-2 1/2 c flour                               
-1 c unsalted butter
-1 tsp salt  
-1 Tb sugar                                
-1/4 to 1/2 c ice water

Filling 
-2/3 cup (packed) golden brown sugar
-1/4 cup flour
-1 teaspoon fresh lemon juice
-1/2 teaspoon ground ginger
-1 teaspoon ground cinnamon
-3 pounds medium peaches


Streusel topping: 
-1/2 cup plus 2 tablespoons unbleached all purpose flour
-1/2 cup old-fashioned oats
-1/3 cup (packed) golden brown sugar
-1/2 teaspoon salt
-6 tablespoons (3/4 stick) chilled unsalted butter, diced
-3/4 cup pecans, coarsely chopped

 -For the crust, mix dry ingredients, then use a pastry cutter or food processor to blend until it resembles coarse meal. Try not to overwork the dough, this can make it tough. add water until the dough just comes together in your fingertips. Press together and divide in half, wrapping each in plastic wrap. You will only need 1/2 of the dough for this pie. Chill for at least 1 hour.
-While the pie dough is chilling, peel, pit and slice the peaches. Mix the other filling ingredients and set aside.
-preheat the oven to 375 F
-For the streusel topping, mix the dry ingredients and add butter in tablespoon sized pieces, and mix with a fork or food processor. Add pecans at the end so they don't get chopped too finely. Place in the fridge until the pie is ready to go.
-Roll out 1/2 of the pie dough on a floured surface till it fits in a 9 inch pie pan. Place crust in the pan, smooth the edges, trim the excess dough and crimp the edges. I used a fork to to create a pattern around the edges of this pie.
-Pour in the peach filling, cover will the streusel topping and pop it into the preheated oven.
-Bake ~45 min at 375 F. The topping should be golden brown and the pie juices should be bubbling.
-Enjoy! 

Lauren with her pie

Wednesday, September 8, 2010

"No Bake" Cool Key Lime Pie


      Key Lime Pie is the quintessential summer dessert, but it poses several problems for a first-time baker. First of all, key limes, which are smaller and sweeter than standard limes are more expensive and harder to find than conventional limes. Also, the filling is typically made of a custard of condensed milk and egg, and it can be a little tricky to get it to the right consistency.  

Limes are harvested year round in some tropical areas, but in other places, trees only produce fruit in the summer. Limes are yellow when fully ripe, but are better when harvested while they are still green.
      This recipe, adapted from Gourmet's 1998 version avoids some of these issues, but may need a little bit of tweaking to reach pie perfection. It is made with a pie shell instead of the traditional graham cracker crust and the filling is thickened with cream cheese instead of eggs, which means you don't have to bake it to get the filling to set up. It also uses standard limes instead of key limes, which saves you the expense and headache of using key limes. Unfortunately, although this is a beautiful pie and the filling was very good, I missed the graham cracker taste and felt like this may be missing something. If you do chose to make it with the pie shell, I would recommend adding something else, like fresh ginger or fruit. 


Key Lime Pie 

Crust:
-2 1/2 c flour                               
-1 c unsalted butter
-1 tsp salt  
-1 Tb sugar                                
-1/4 to 1/2 c ice water
-Plastic wrap
OR
Premade graham cracker crust

For filling
-1 pound cream cheese, softened
-3/4 cup fresh lime juice
-a 14-ounce can sweetened condensed milk
-1 teaspoon finely grated fresh lime zest

For topping
-1 cup crème fraîche (may be made with 1 c heavy cream and 1 Tb of sour cream, left to stand overnight)
-1/4 cup confectioners' sugar

-For the crust, mix dry ingredients, then use a pastry cutter or food processor to blend until it resembles coarse meal. Try not to overwork the dough, this can make it tough. add water until the dough just comes together in your fingertips. Press together and divide in half, wrapping each in plastic wrap. You will only need 1/2 of the dough for this pie. Chill for at least 1 hour.
-For the filling, mix all ingredients well. Make sure the cream cheese is well blended, or you may end up with plain cream cheese chunks in your pie.
-Roll out pie dough, place in 9 inch pie pan, smooth and cut off excess dough. Crimp edges and prick the bottom of the crust with a fork. Fill with pie weights or (as I did) cover the crust with foil and fill the foil with uncooked rice. This will keep the shell from puffing up and infringing on the space for the filling. Chill the shell for at least 30 minutes
-Bake crust at 350 F for 20 minutes, then remove foil and rice and cook until the crust is golden brown, ~10-15 more minutes.
-allow crust to cool completely and then chill for 1 hour.
-fill the crust with cream cheese mixture and chill while making the topping.
-whip crème fraîche until it forms soft peaks, continue to whip and add powdered sugar slowly. Spread mixture carefully over the filling, allow to chill for at least one hour or up to one day, loosely covered.

Tuesday, August 10, 2010

Starting with basics- Double Crust Apple Pie

There's nothing more comforting (and midwestern) than apple pie- and it's one of my favorites, with spicy cinnamon, crisp, buttery crust and tart apples. In the fall, when a variety of apples are available, I like to use Cortland apples. They are tart, crisp, hold their shape well with baking and are also large, which minimizes peeling. However, granny smith is a commonly used apple which is available and relatively inexpensive year-round. Most apple pies have some lemon juice, but this also has lemon zest which adds a little extra "kick". Believe me, it tastes as good as it looks!

Double Crust Apple Pie (adapted from Martha Stewart)

Crust:
-2 1/2 c flour                               
-1 c unsalted butter
-1 tsp salt   
-1 Tb sugar                                
-1/4 to 1/2 c ice water
-Plastic wrap
Filling:
-2 Tb flour                                 
-Cored, peeled sliced apples (~4 medium sized apples)
-1/2 tsp nutmeg
-Pinch of cloves 
-1 1/2 tsp cinnamon
-3/4 c sugar                                
-Zest and juice of 1 lemon          
-2 Tb butter
-1 large egg, beaten

-Make the crust by mixing flour, salt, sugar and butter with food processor or pastry cutter to make coarse crumbs
-Add ice water slowly, while mixing, until dough forms
-Divide dough in half, form into 2 disks and wrap in plastic wrap
-Chill for at least 1 hour, roll out to fit pan ~10 inch diameter for an 8 inch pan, and chill for 30 min before baking.
-For the filling, mix apples, sugar, lemon, flour and spices.
-Press crust into pie pan, fill with apple mixture. Dot with butter.
-Put second crust on top, trim if necessary, and crimp edges. Then, cut vents in the top crust, brush with egg and sprinkle with sugar (coarse sanding sugar is prettier, but regular granulated sugar is fine)
-Bake for 1 hour at 375 F. The top crust should be nicely browned and pie juices bubbling through the vents. If you don't see this, you may need to bake a couple more minutes.